So.....today I don't have a project for you, but I do have a tip on finding cute buttons! While it takes a bit more time and effort than hitting the button aisle at your favorite fabric store, I have found some really cute/cool/bizarre buttons for much less than I would usually pay at my favorite fabric stores. Where to shop........ Goodwill, thrift stores, your own closet, anyone's closet that you have access to and a knowledge of what they want to get rid of! I have found all kinds of neat stuff, often for under a dollar! I simply take the clothing item with the cool buttons home, wash well, and cut the entire button band off of the item. That way, all of my matching cool buttons are still together. Or, I cut the buttons entirely free of the fabric and put them in a zip baggy. Yay!!! Unique and cheap buttons!!!
Purple textured buttons and a nice brown and white combo. Do note that the cute buttons do not necessarily have cute clothes to hold them, so check everything to find the cute ones!
The things that I am learning about myself, crafting, sewing, and raising 3 wonderful kids.
Wednesday, February 29, 2012
Friday, February 24, 2012
Nothing on a Friday
So, I have lots of half finished projects, but nothing to show today. It has been another crazy week, and stuff just didn't finish itself like I had hoped it would while I was busy. D and M both have nasty colds and want lots of cuddling. I love to cuddle with them and know that one day they will outgrow it, but it is hard to cuddle them both at the same time. You see, they don't want to share me, my lap, or my arms. They try to shove the other one away, which really does very little to help anyone stop crying. W seems to be on a tooth pulling spree(One last Thursday and one yesterday). And, other people in the family have been sick too.
We did have a good beginning to the week with Shrove Tuesday. The pancake dinner/Mardi Gras party at church was a blast. At least it was a blast until M lost it and started screaming when it got close to bedtime. Other than that, it has been a quiet, stay at home, accomplish very little week.
I hope you all had good weeks and have great plans for the weekend!
We did have a good beginning to the week with Shrove Tuesday. The pancake dinner/Mardi Gras party at church was a blast. At least it was a blast until M lost it and started screaming when it got close to bedtime. Other than that, it has been a quiet, stay at home, accomplish very little week.
I hope you all had good weeks and have great plans for the weekend!
Tuesday, February 21, 2012
Another Monday
So.... yesterday was a holiday from work for me, and W had the day off from school. The little ones were with their dad for the weekend, so I had a day to myself, mostly. I tried to do a great many things, but accomplished less than I had hoped to do. It was mostly a day to try to catch up! I started off with decorating a shirt for a little girl. (Not Miss M) Then, I upped the excitement level by hemming two pairs of pants for my dad. It was thrilling. I got the top of a baby blanket ready to go, and made a dish towel for my cousin. (Yes, Jen, since you read this, I made you something!) I also made an extender for Oliver's coat, so his tummy strap would be less snug. Then, I finished the ruffle scarf that I posted yesterday and cut out the fabric for D and M's St. Patrick's Day clothes.
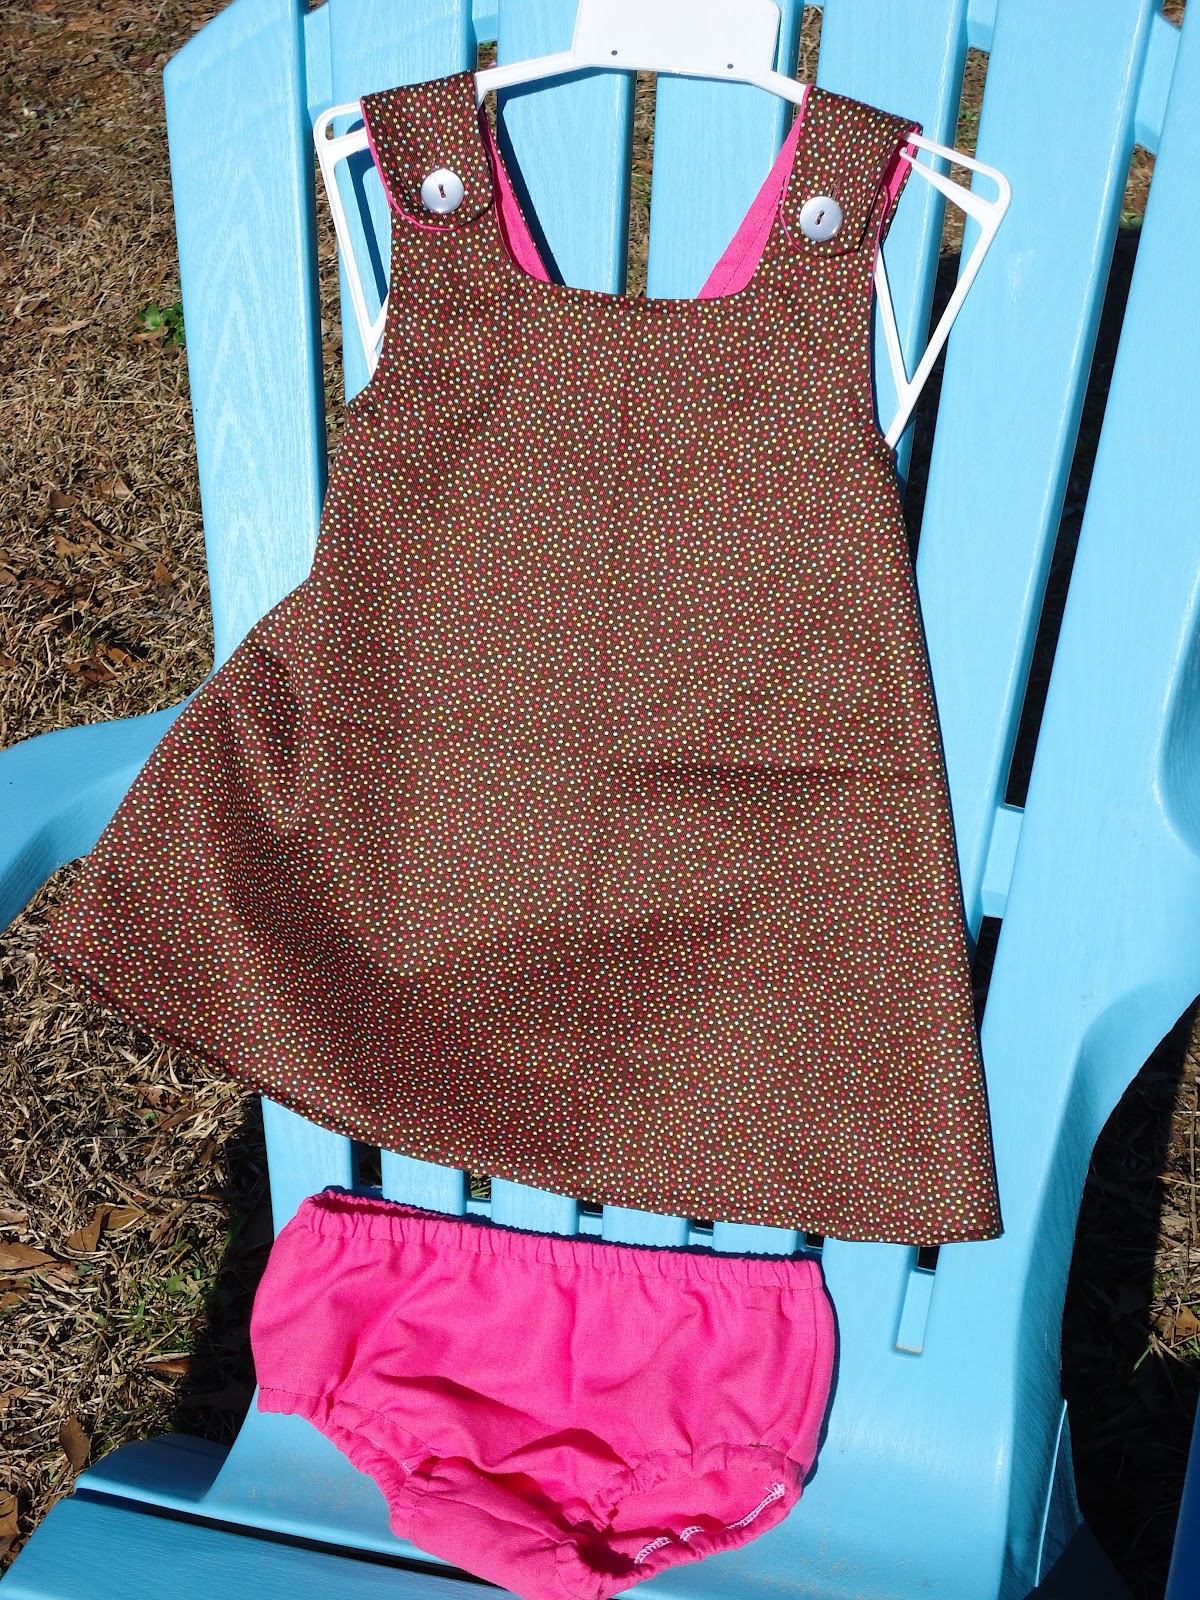
Then, I finished the dress that I started here. M will be so cute in this when the weather gets a bit warmer!!!
The back crosses over itself and the inside shows, so it is fully lined. The bloomers match the lining, and the rest of info on that dress will come later!
And now, I have a job before me. It is to help a very small, very weak child. Details will not get posted on this project, but I hope it turns out well.
Have a great day!!!
Then, I finished the dress that I started here. M will be so cute in this when the weather gets a bit warmer!!!
The back crosses over itself and the inside shows, so it is fully lined. The bloomers match the lining, and the rest of info on that dress will come later!
And now, I have a job before me. It is to help a very small, very weak child. Details will not get posted on this project, but I hope it turns out well.
Have a great day!!!
Monday, February 20, 2012
Ruffle Scarf
I am fairly certain, without looking, that there are several, if not tons, of similar patterns on Ravelry for scarves like this. But.... I didn't use them. I picked out some yarn and needles and got started without a real plan or pattern. Basically, it was going to be a really long skinny rectangle, but I quickly got bored with that plan. I knit this scarf longways, so I decided to add a ruffle to one of the long sides.
I cast on about 300 stitches on a 36" 6 mm circular needle with my yarn, Bernat Mosaic in Ninja, held double. I knit about 1.5 inches in garter stitch and then decided to make a ruffle. On the next row, I knit two together, knit one, knit two together, knit one...... This cut the length of the scarf by a third. Then, I kept up the garter stitch until I was about to run out of yarn. This gave me about a 4.5 inch wide scarf that is about 48 inches long.
W was kind enough to model the scarf for me....
.... until he realized why I was taking pictures!
Here is a close up of the colors. I am not sure why it was named "Ninja."
Now, to wrap and gift it!!!
Friday, February 17, 2012
Two Toddler Backpacks
So, during one of my internet surfathons, I found this tutorial and knew that I would need to make it. D and M watch W leave for school every day on the bus and watch for him to come home too. They need backpacks so they can be like their big brother. They already like to pretend, so I think these will be perfect.
There are really only three things that I did differently on these. I didn't baste the straps into place before sewing. I just pin away and sew the whole thing. I also had to trim the front and back panels, as my side piece didn't seem to be long enough. I don't know if it is the tutorial or me with the problem, but you might want to check the length that your side piece needs to be before cutting. I think that the next time I make one of these, I will make about a 36" side piece and then decide how much to shorten it. And, I do interfacing differently. And, by differently, I mean that interfacing and I have a difficult relationship, and I do it the way I have learned to reduce the amount of ruined interfacing and fabric. I begin by cutting out the pattern pieces from the interfacing. Then, instead of cutting out matching fabric pieces and then ironing, I iron the interfacing pieces onto the uncut fabric. Then, I cut these pieces out, and the edges all line up nicely!!! I didn't take many pictures of the process, but the tutorial link can show you the steps. Here are the finished products. I think they turned out very nicely.
Have a great day!
There are really only three things that I did differently on these. I didn't baste the straps into place before sewing. I just pin away and sew the whole thing. I also had to trim the front and back panels, as my side piece didn't seem to be long enough. I don't know if it is the tutorial or me with the problem, but you might want to check the length that your side piece needs to be before cutting. I think that the next time I make one of these, I will make about a 36" side piece and then decide how much to shorten it. And, I do interfacing differently. And, by differently, I mean that interfacing and I have a difficult relationship, and I do it the way I have learned to reduce the amount of ruined interfacing and fabric. I begin by cutting out the pattern pieces from the interfacing. Then, instead of cutting out matching fabric pieces and then ironing, I iron the interfacing pieces onto the uncut fabric. Then, I cut these pieces out, and the edges all line up nicely!!! I didn't take many pictures of the process, but the tutorial link can show you the steps. Here are the finished products. I think they turned out very nicely.
Have a great day!
Friday, February 10, 2012
Friday, At Long Last
It is finally Friday! I had originally planned to have a cute post for today, but that didn't happen. What happened.... was just life. We got busy around here. Nothing bad, and actually some of the week was really really good! So, instead of something crafty that I did this week, we have cuteness! (Thug M)
W has the last of his Cub Scout stuff this week before he moves up to Boy Scouts next month. D and M had lots of play time this week, inside and out. The outside stuff was a blast, but of course my camera was inside. M loves to pick up tiny rocks and make a pile. D loves to play in the dirt. It was a fun week, just not too crafty. I did start knitting a scarf, but it is not picture worthy yet. And...... one of my cousins got engaged last night!!!! We are all super excited for and with the happy couple.
Thursday, February 9, 2012
Oliver's Coat
Nope, no kids here named Oliver. But, I do happen to know an Oliver. My little cousin is his mom, and he is a pig. No kidding. A pig.
And, Oliver was found to need a coat. Apparently pig coats are often custom made and can be quite pricey. That is where I come in.... the custom made part, not the pricey part. I have done a good bit of sewing for my cousin before (bedroom decor cannot be found with pig themes), so they asked if I could make one. I said, "Sure!" I was referred to a facebook page to see what they were thinking, and I started by getting Oliver's measurements and making a test coat. I didn't get pictures of the test coat fitting, but I did pretty good for my first pig coat. So, on to the "real" pig coat. (Which just sounds funny to me.)
First, I adjusted my original pattern to make it shorter by about 2 inches. I also had to adjust the location of the straps. Then, we tried the coat on Oliver.
There he is!!! Oliver in his new coat!!! And yes, the Cheerios were necessary to get him to put the coat on.
And, Oliver was found to need a coat. Apparently pig coats are often custom made and can be quite pricey. That is where I come in.... the custom made part, not the pricey part. I have done a good bit of sewing for my cousin before (bedroom decor cannot be found with pig themes), so they asked if I could make one. I said, "Sure!" I was referred to a facebook page to see what they were thinking, and I started by getting Oliver's measurements and making a test coat. I didn't get pictures of the test coat fitting, but I did pretty good for my first pig coat. So, on to the "real" pig coat. (Which just sounds funny to me.)
First, I adjusted my original pattern to make it shorter by about 2 inches. I also had to adjust the location of the straps. Then, we tried the coat on Oliver.
There he is!!! Oliver in his new coat!!! And yes, the Cheerios were necessary to get him to put the coat on.
Subscribe to:
Posts (Atom)